If you want to use the new SharePoint app model to install the Quick Links web part on your website, then you are in the right place. 😉
If you want to install the Quick Links web part using the app model you will need to have the app store configured.
In SharePoint 2013 on premises, you may need to configure the **SharePoint app store** before you can install apps. If you need any guidance, check out this article: https://blogs.technet.microsoft.com/mspfe/2013/01/31/how-to-configure-sharepoint-2013-on- premises-deployments-for-apps/.
But first, the requirements:
- SharePoint Online or SharePoint 2013+ with the app store configured
- Have global SharePoint Administration rights
Let's get you started:
1# Upload the app catalog
The steps in this section need to be done only **once per SharePoint instance** by a global **SharePoint Administrator**. After this initial installation, the web parts will become available for installation in each site collection.
- Login to your Office 365 admin center page with an administrator account;
-
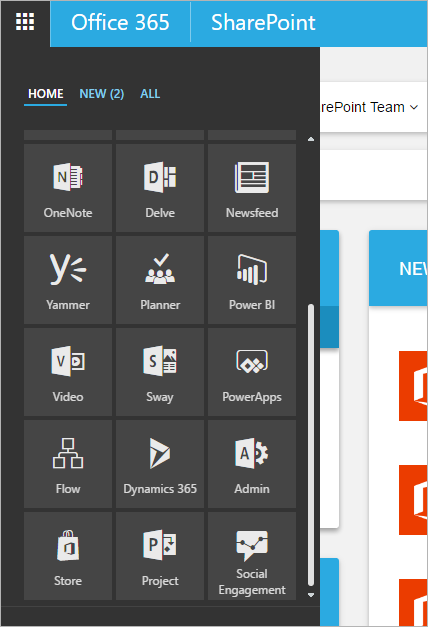
Open the app launcher and click on Admin;
-
Open your SharePoint Admin Center;
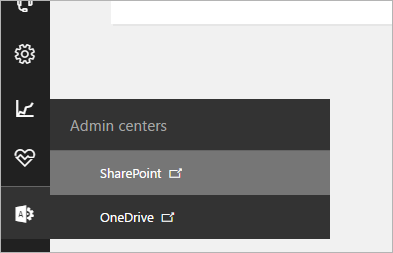
If you can’t find the apps button, look for add-ins.
-
On the left pane, click on apps and then App Catalog;
-
On the left pane, click on Apps for SharePoint;
-
Now click on Upload and upload the app file that is inside your web part package.
Now you can install the web part in every site collection in your SharePoint tenant. And that's what you are going to do right next! 🙂
2# Install the web part
The steps in this section need to be done for **each site collection** where you want to use the web part by a **Site Collection Administrator**.
-
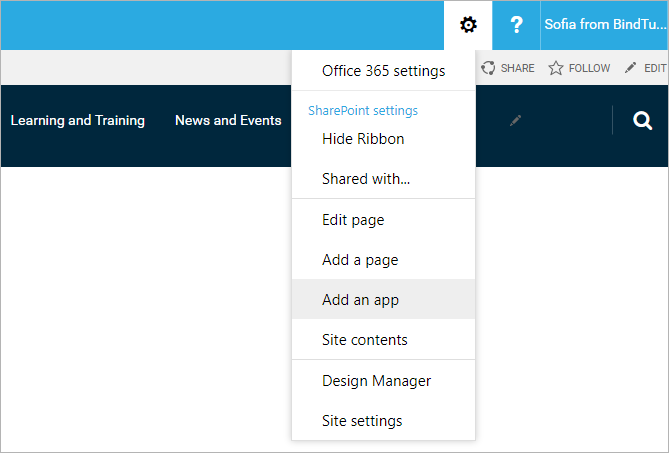
Open the Site Collection where you want your web part installed, and select Add an App;
-
Search for "bt" in the search box and select the web part app;
-
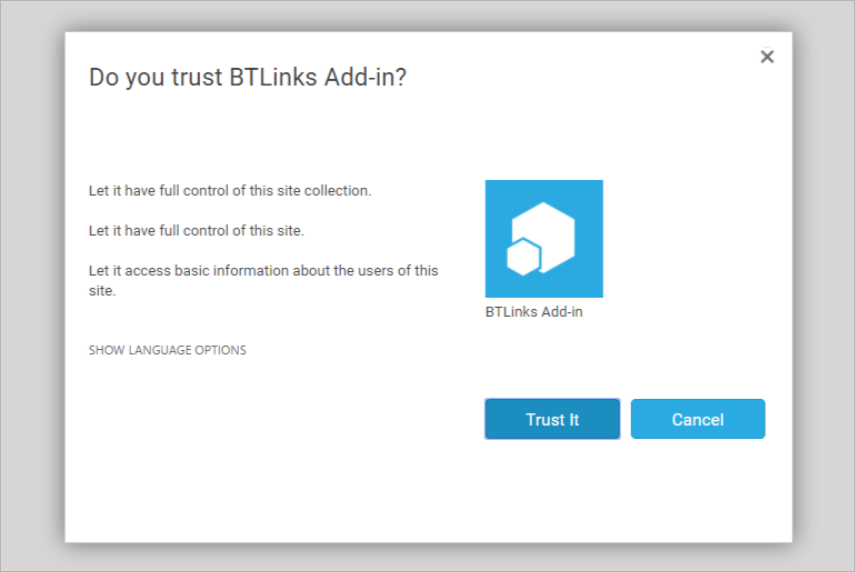
Click on the Trust It button and wait for the app to install;
-
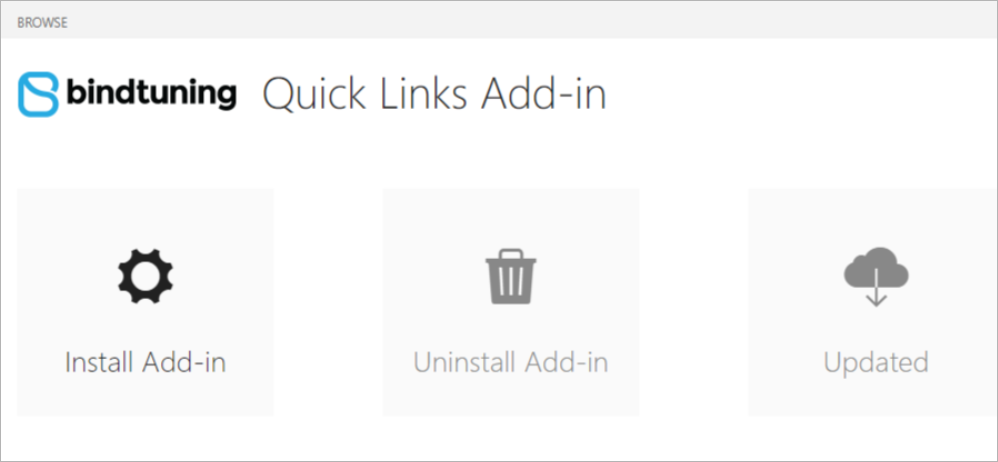
Open the settings menu (gear icon) at the top and click on Site Contents;
- Open the web part app;
-
Click on the Install Add-In button and wait for the installation to finish.
Web part installed! ✅
Done! To complete the setup process the only thing left to do now is to configure the web part.
Next - Configuration